Do you need a cheap, but beautiful stall door for your horse? This is a great tutorial for how to DIY a dutch horse stall door.
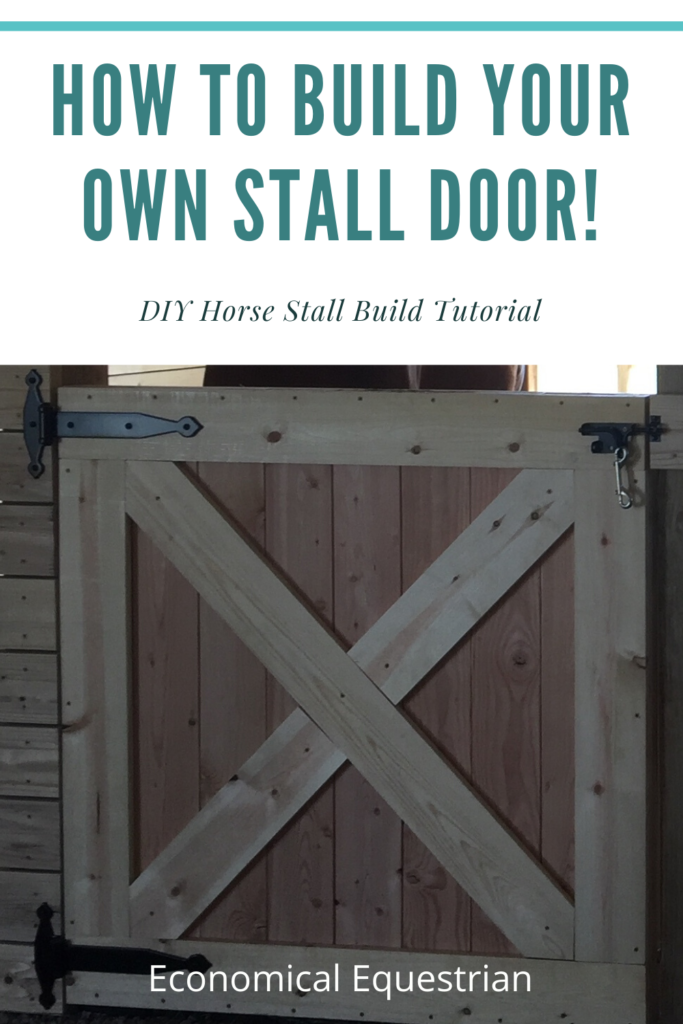
To build a dutch horse stall door for cheap, you may find lots of tutorials online, that range from pretty helpful, to not helpful at all, to wanting you to purchase their building plans. We read all the tutorials online and still weren’t quite sure how these were going to go together.
Here is what we made at the end (this is a real-life unflattering photo of my ponies), with their new beautiful DIY stall doors.
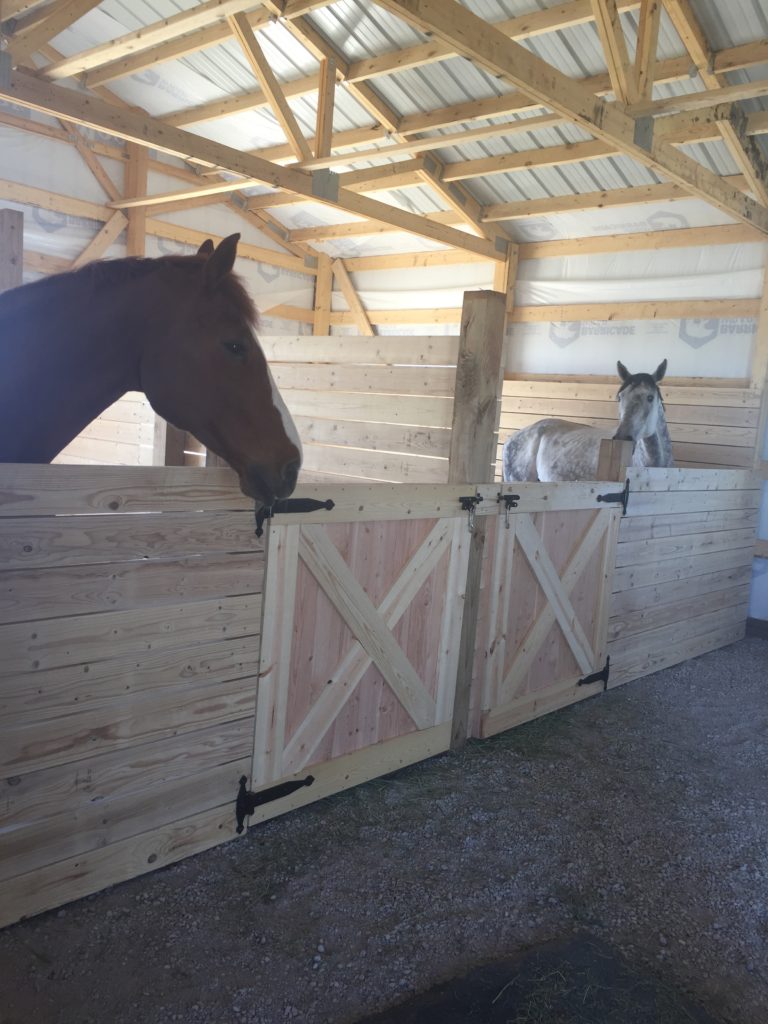
I am a jump in and see if we do it right kind of person, while my husband is very methodical and calculated in how he does things so this took a bit of compromise for both of us to pick a plan and go with it. We combined a few plans we had found online. Read on to learn how to build a dutch door from scratch.
We just built a barn about a month ago (I say “we” but really “we” just paid for it and had someone else build it). We used a local pole barn builder, and are thrilled with how it turned out.
Our barn is 24×48, and we designed it with kind of an odd layout because we want to be able to have paddocks off each stall and it is set into a hill. So we needed to figure out how to build horse stall fronts. We built our stalls out of wood, and wanted beautiful DIY dutch doors for the stall fronts.
Anyway, our contractor who built the barn did say that he could build our stalls and doors if we wanted to hire him to do it but that it would cost significantly more than doing it ourselves, and if we did it ourselves, it would be relatively easy to figure out and take us a weekend to do a door or two.
It was a bit daunting since we’ve never built anything like this before. But we read all the tutorials out there and combined the directions to meet our needs.
We are starting with the interior doors first, because we’re coming into summer and probably won’t need the exterior doors for a few more months. I’ll do another tutorial for the double dutch doors on the outside of the barn once we start building them.
We constructed this door in layers, so if you are wondering what I mean when I refer to middle and outside, that is why! The back is plywood and trim, the middle is 2x6s and the front is the dutch cross (X) and the trim board on the horizontal and vertical parts of the front of the door.
In this particular example, we were building a door measuring 48 inches tall by 47 inches wide. We found it was best to allow at least 3/4 inch to 1 inch of space between the measurement of your door opening and the size of the door you are building.
Necessary Materials to Build your own dutch stall door:
- 2x6x8 boards: Quantity 5 (you can use tongue and groove if you prefer, but it is much more expensive and we were trying to keep costs down)
- 1x6x8 boards: Quantity 6 (can also buy 6 ft long boards as well if you would like – we had to do that because Home Depot was out of 8 footers that looked nice and flat)
- Plywood: Quantity 1 (we used one 4×8 foot board to build two doors) 1/2-1 inch thickness depending on how thick you’d like your door. We used 1/2 inch.
- 2 inch screws
- 2.5 inch screws
- 3 inch screws
- Circular Saw
- Miter Saw
- Pencil
- Ruler
- Protractor
- Framing square
- Measuring Tape
- Drill
- Hinges (to hang the door once you build it)
This DIY Horse Stall door only cost me $54.30 in materials (I did have the screws, drill and saws on hand already, so you will pay a bit more if you have to buy all of those things.)
You’re going to need a flat clean-ish spot to build this door. We swept our garage and used that since it is the most level place we’ve got that is out of any possible rain and wind.
Step 1: Measure your door opening.
How wide should a horse stall door be?
A horse stall door should be at least 4 feet wide. This allows room for the horse and handler to safely go through the door. We set our own posts inside our barn, so we set the edges of our 6 inch square posts to be approximately 48 inches wide (one was a little wider and that’s ok because you can adjust the size of the door you’re building!)
Make sure you measure exactly. In this example, my door opening was 48 inches. Since you need some wiggle room and some space for hardware, I suggest subtracting at least 3/4 of an inch, but 1 inch works well too. On the other door we did, we only allowed 3/4 inch and it was a bit tight when we tried to hang it.
Step 2: Gather your materials (listed above)
Step 3: Cut your boards to size.
We started by cutting our horizontal trim boards for the front of the door first. So since my door opening was 48 inches and I said to subtract an inch, that is 47 inches.
Cut two trim boards to 47 inches from your 1x6x8 board.
Next you will need to cut the vertical running 2x6s for the middle layer of the door.
Your 2x6x8s might be exactly 8 feet long or they could be a tad longer. Ours were 8 foot 3/16ths inches. We just cut them in half (this will be the height of your door). Measure and cut the 8 foot long boards.
The last one will need to be cut vertically to fit the width of the door. For example, each 2×6 is exactly 5.5 inches wide, but you’ll probably only need an additional 3.5-4 inches to get to the 47 inch width.
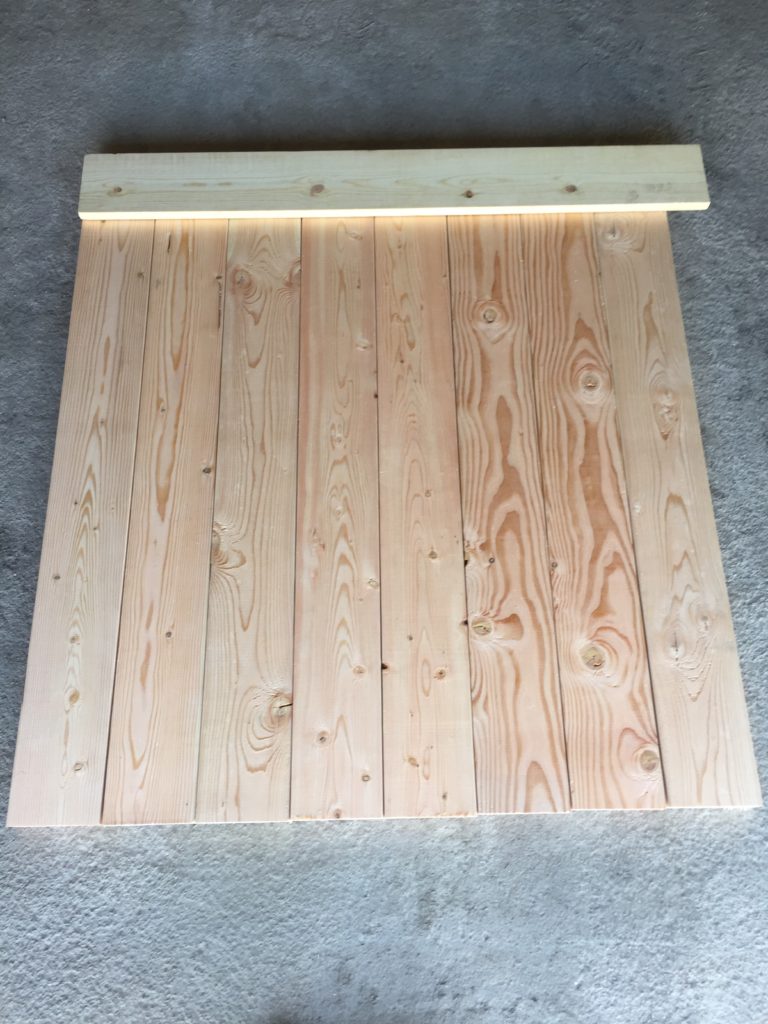
Step 4: Lay out the 2×6’s
Lay the 2×6’s (now about 4 feet long) down on the ground right next to each other. The side facing up will be the outside of your door so pick the side of the wood you’d prefer to look at. If you chose to use tongue and groove wood, you would fit the wood together using the tongue and groove system at this point.
I think our doors turned out pretty well just using regular old 2x6s. Lay the horizontal trim boards out on top and bottom of the 2x6s at a perpendicular angle.
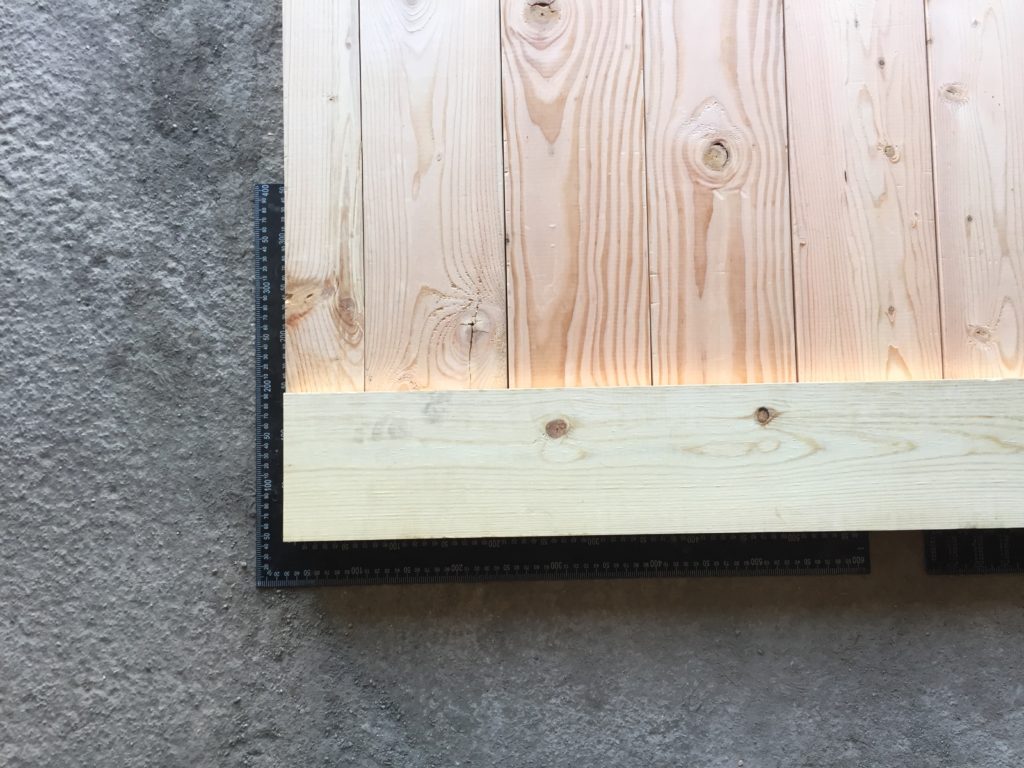
Step 5: Make sure you have square corners and your boards are lined up straight.
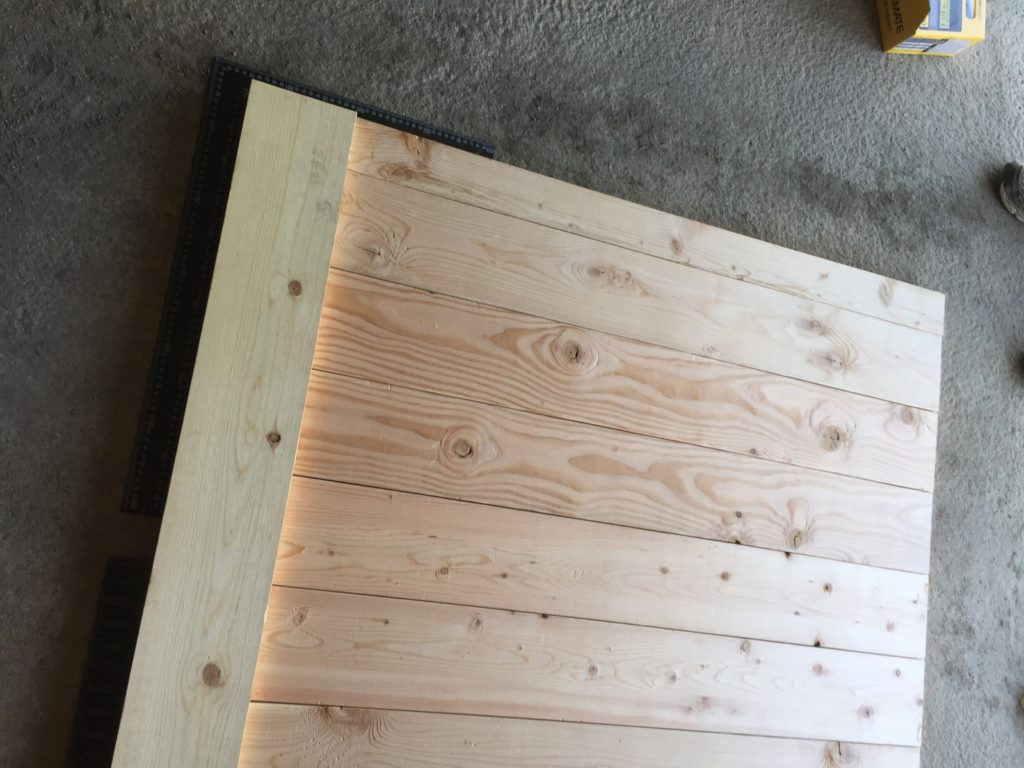
I used two framing squares, like this one to make sure I had the boards lined up and the corners square. Alternatively, you can build a square corner with 2x4s so you can line up the boards on the frame you built.
We didn’t feel like adding that extra step so I used the framing squares and checked the corners multiple times to line up the boards in a straight line as well as make sure the corners were square.
Step 6: Attach the horizontal trim boards to the 2x6s.
We used 2 inch screws, and put the screws on the outside edge. One screw in the middle of each vertical 2×6, placed approximately 3/4 of an inch from the outer edge. This is important to put the screws on the outside edge if you are going to make the door exactly like ours because you will need to be able to drill screws through the middle of those trim boards. Put screws into the top and bottom horizontal trim boards.
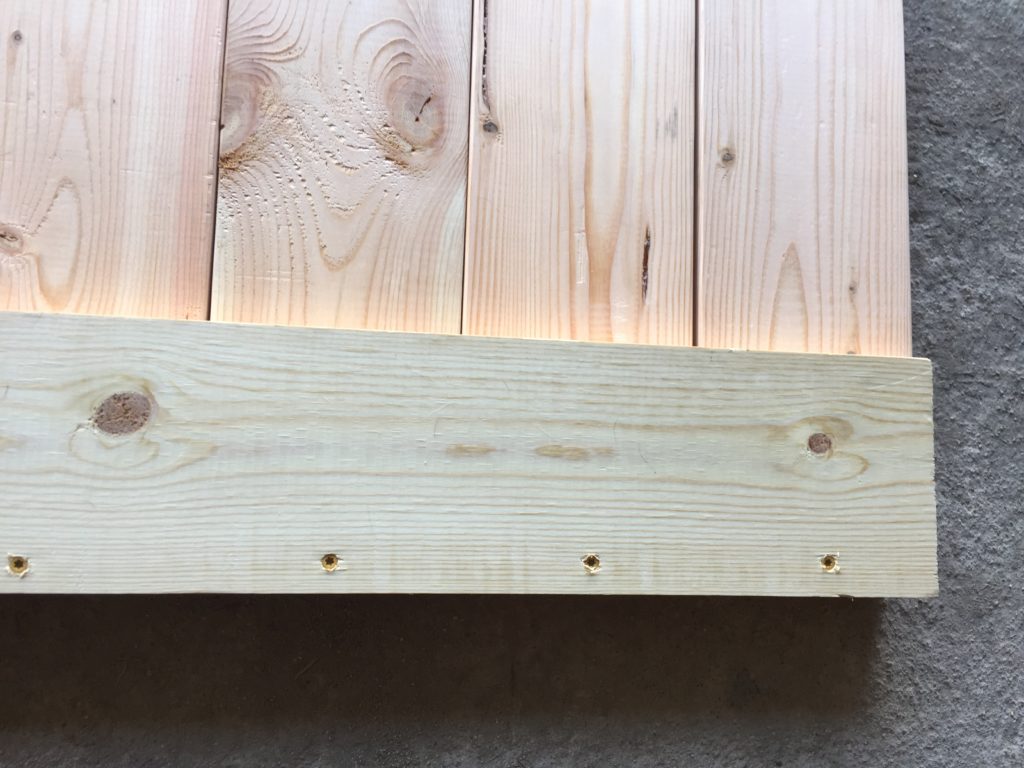
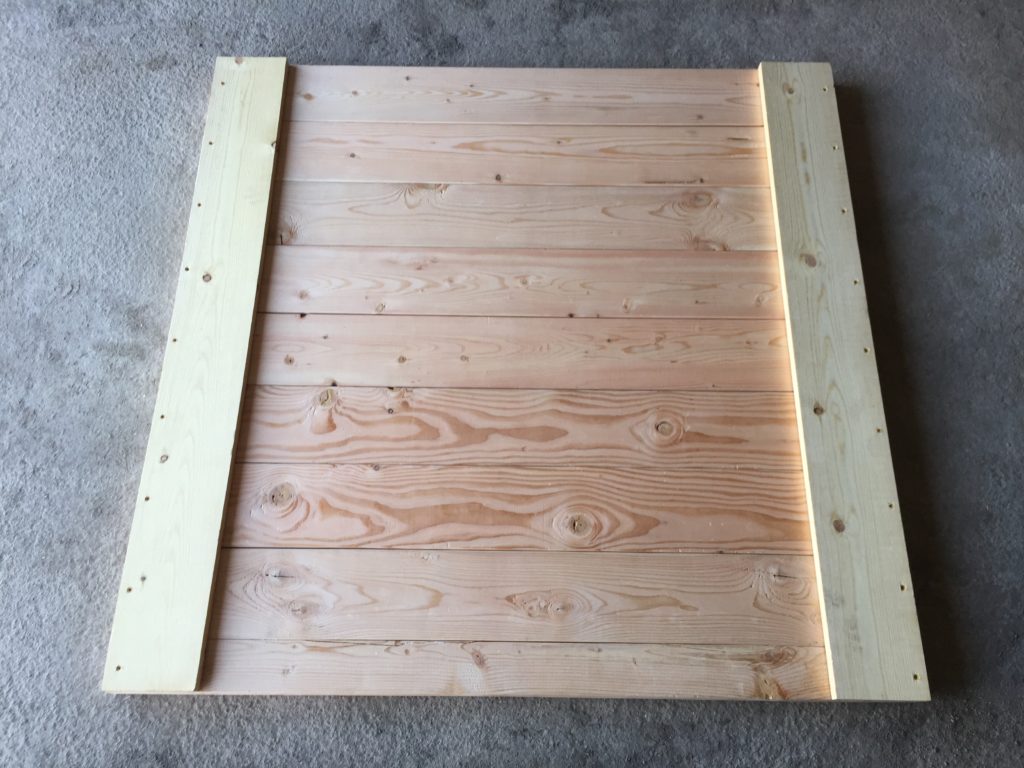
Step 7: Cut the vertical trim boards to size.
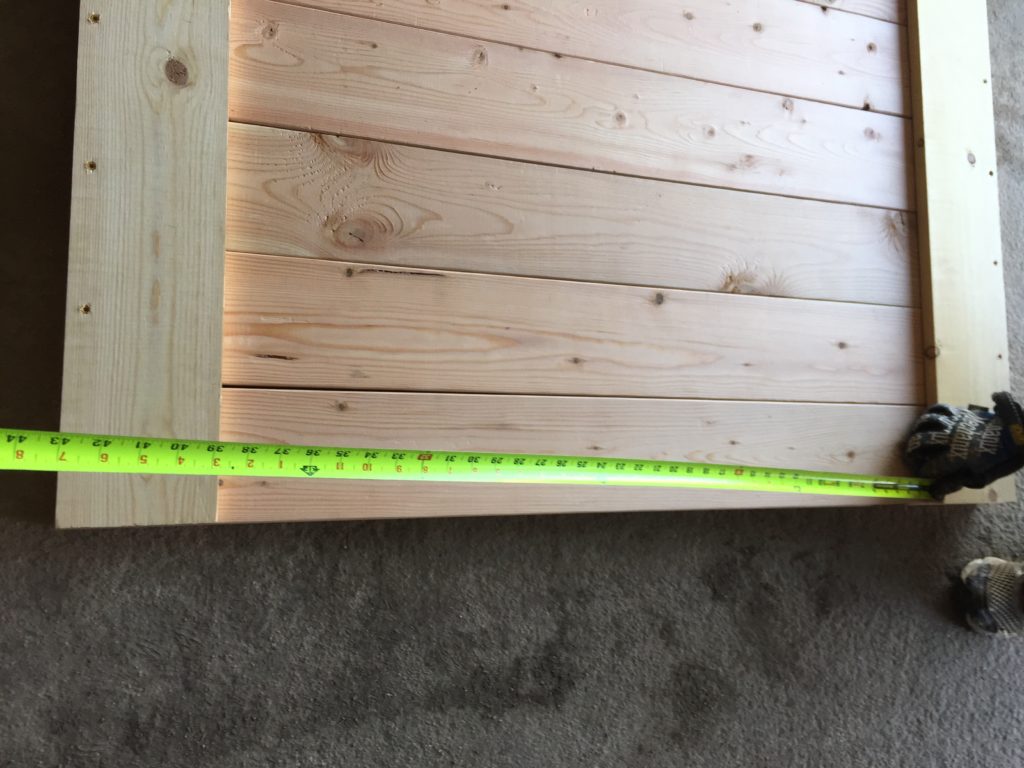
Our first door attempt was a tad short, so definitely make sure you measure this accurately, and aim for a smidge (like 1-2/16th of a inch) more than it looks like. Then these boards will fit snugly into their spot. Again attach with 2 inch screws along the outside (we just did three screws on each vertical trim board).
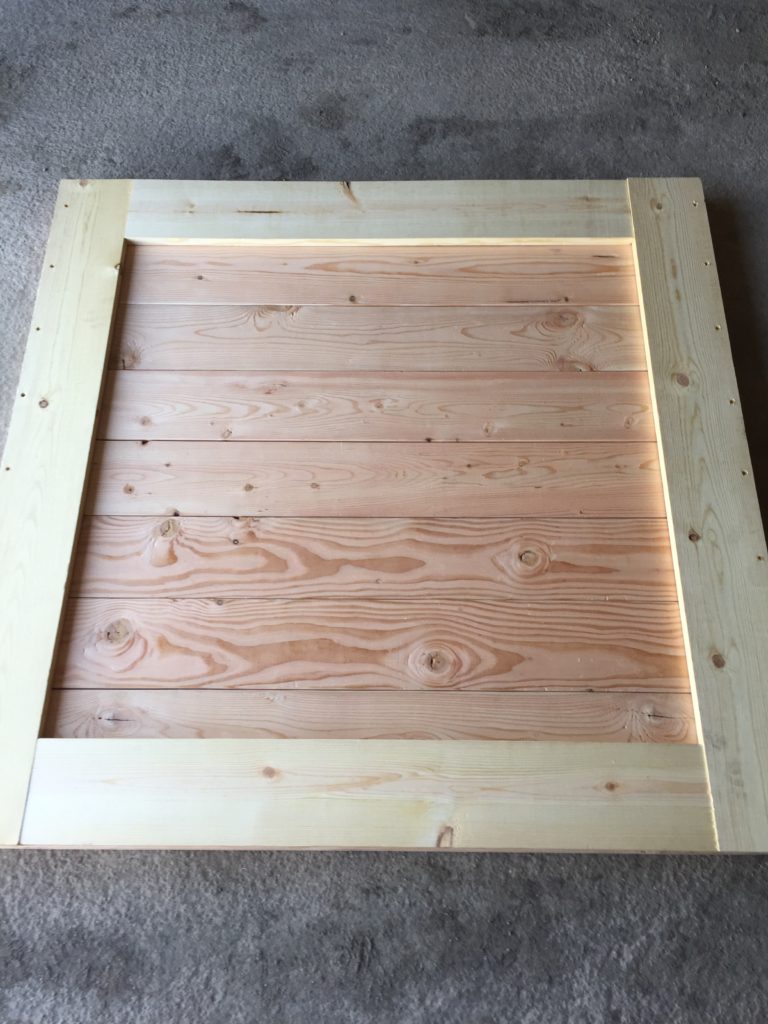
Step 8: Make the dutch door cross.
To make the traditional cross of the dutch door, you will need to measure from corner to corner of the inside of your horizontal and vertical trim boards to get this measurement. I would add 1-2/16ths to whatever you measure for a tighter fit. To make the boards fit into the corners, you will need to cut two 45 degree angles. A good miter saw will do these cuts pretty easily. We marked the mid point of the board and then a 45 degree angle using a protractor and draw a line between the two marks. Then adjust your miter saw to 45 degrees and cut the boards along the lines you just drew. Fit this piece into the middle of the trim boards.
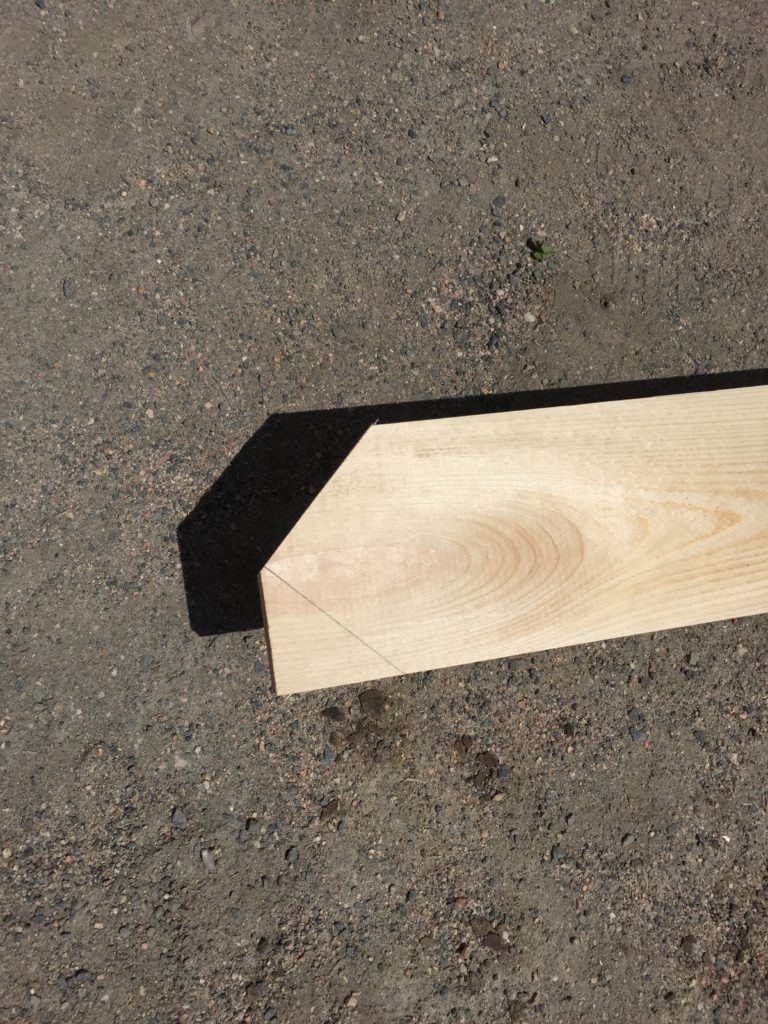
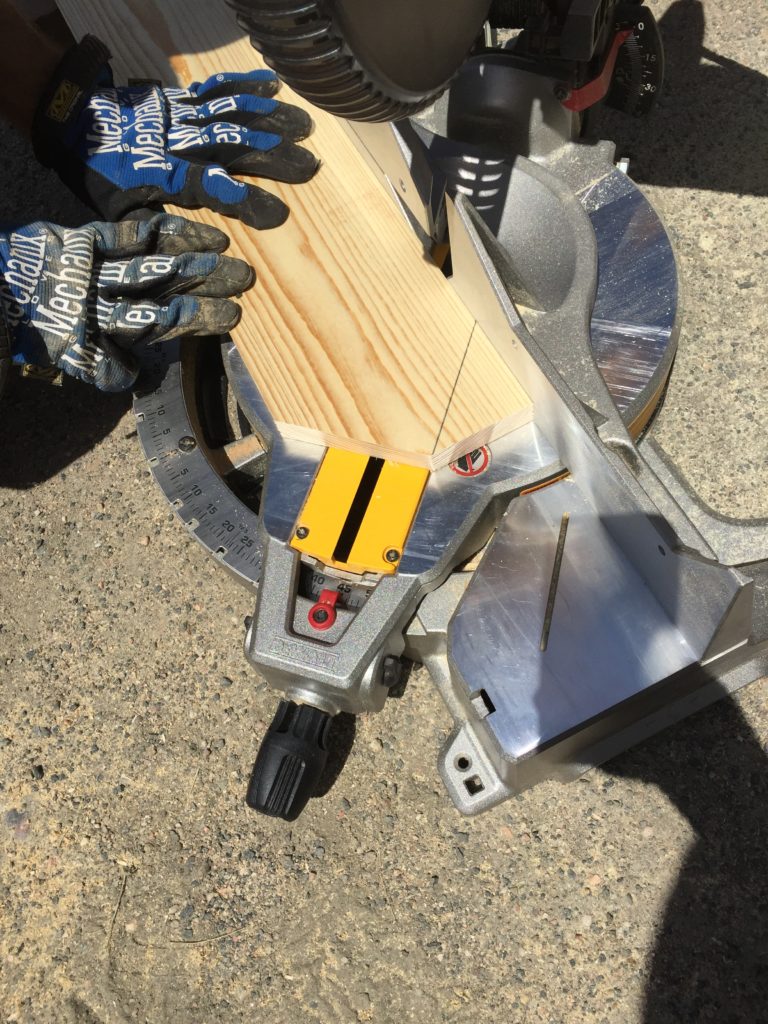
Measure from the center board to the corner closest to that edge. Again, add 1-2/16ths to this measurement to get it to fit snugly. The second door we built turned out much better adding just a little bit of length to these trim measurements. The trim pieces will fit snugly into place if you do this.
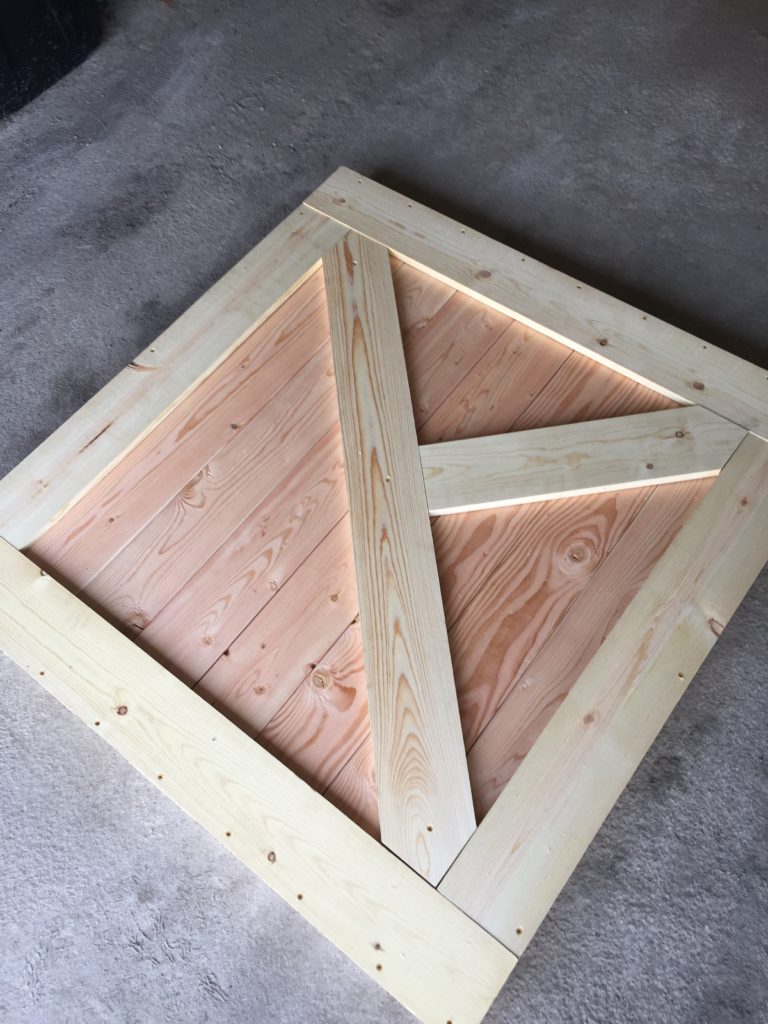
Attach the cross boards with 2.5 inch screws in the middle of the boards. We used 3 screws in the full diagonal piece and two screws in the half pieces finishing off the cross.
Step 9: Flip the door over.
Step 10: Cut the plywood to size.
Our plywood needed to be 48×47 inches. Which worked great since we built two doors, so just needed one piece of plywood. We used 1/2 inch plywood, but you could use any size really, depending on how thick of a door you want.
Use the measuring tape and pencil to make a straight line across the plywood. Then use your circular saw to cut along this line.
Step 11: Cut the trim boards for the back of the door.
Cut horizontal trim boards from 1×6 boards to the width of the door first (for our door that is 47 inches). Screw these on in the middle of the boards using 2.5 inch screws. Once you have attached the horizontal trim boards, you need to measure for the vertical trim. We noticed on the first door we did that we should add 1-2/16ths to our measurement because we measured too conservatively. If you add 1-2/16ths, you will end up with a tighter fit. Screw each vertical trim board in with at least two 2.5 inch screws. At this point, you can leave the door as is, or add the dutch door cross on the back if you’d like to.
Step 12: Stain/paint and caulk your door.
We did not caulk/paint our door because we like how it looks without, and we don’t have much moisture to contend with so we’re hoping they’ll hold up a while. Your door will last longer if you do this step.
Enjoy your beautiful horse stall door!
Step 13: Hang your door
These are the hinges I used. They each can hold 120lbs, so I figured they should hold up to the weight of the door plus a horse leaning or pushing on it. Funny story – my husband texted while at the store asking if he had found the right hinges (with a picture). He found hinges that were rated to 50lbs. Not the right ones! While they may work for the door, those would not hold up long term to horse weight and abuse.
Ta-Da! Here is the final product.
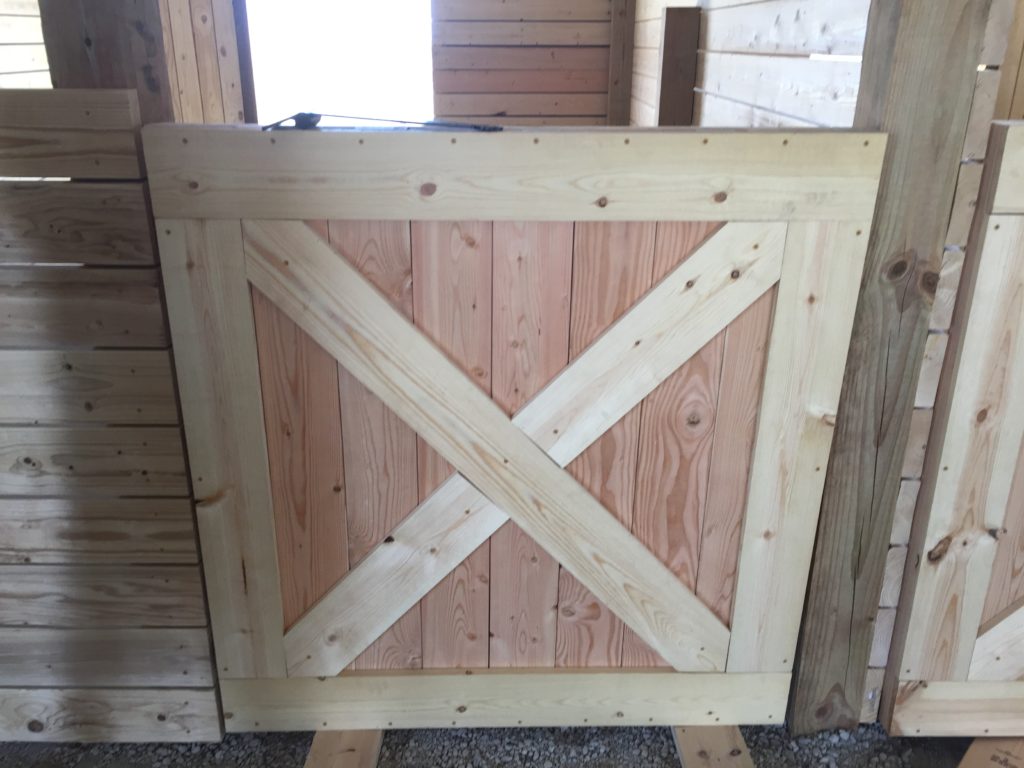
Now enjoy your beautiful handy work!!
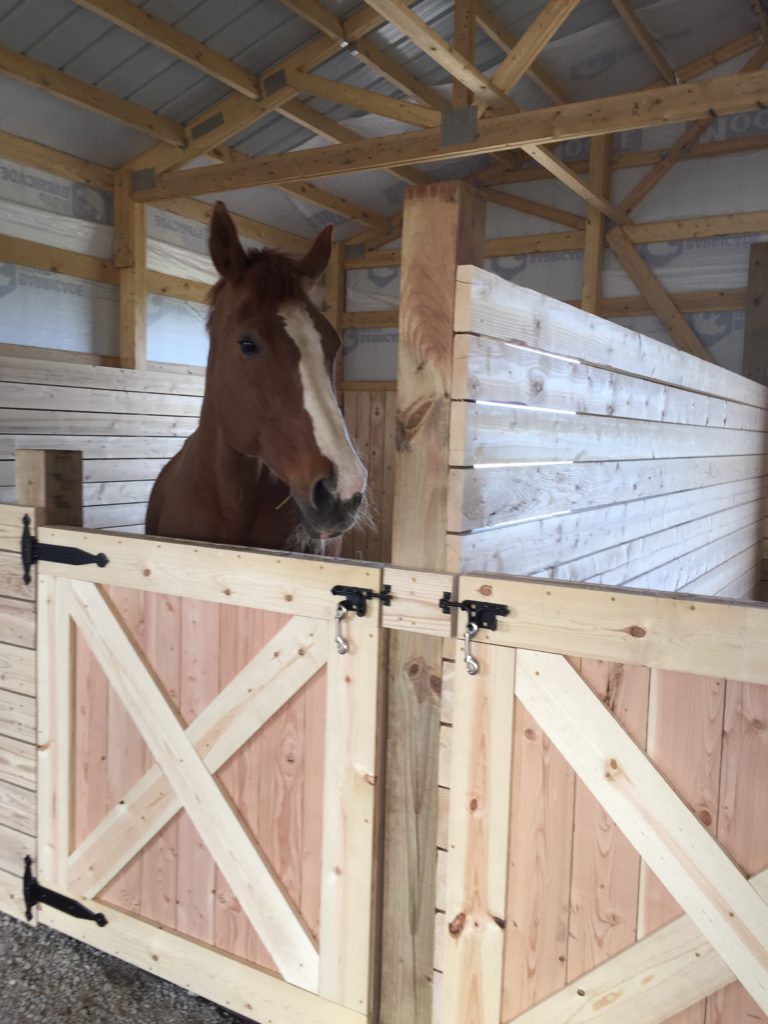
I’ll admit that when I read the different dutch door directions out there, I was a bit worried about how I was going to build these doors… I figured it would be really hard, but it actually wasn’t. The first door we made did take us about 6 hours, but the second door only took 2.5. We learned a lot as we built that first door.
Stay tuned for a tutorial for double dutch stall doors that we are going to put on the outside of our stalls.
I hope that our DIY stall door tutorial can help you build a horse stall door of your own!
Do you have your half wall boards screwed in? Seems the horses could kick the boards right off?
Yes, all the trim boards are screwed in around the outside edge (from the front of the door) and through the middle of each back board. All parts are screwed together 🙂